Have you noticed an unknown program called “One launch” that causes the ads to pop up continuously on your computer? Today’s article will explain this program and how to remove it from your PC.
Are you short on time and want to know the quickest removal method? Fortunately, Spy Hunter software can easily remove this unwanted program. Spy Hunter detects a malware, removes it, and safeguards your PC from future security threats.
Is Onelaunch Malware or False Positive?
One launch is adware based on Chromium which displays ads on the victim’s computer. Adware is a type of malware designed to generate revenue for its creator. It generates revenue by aggressively displaying ads on your computer. Here’s more on how this adware harms your computer:
- Creates pop-up windows
- Displays continuous ads
- Changes your browser settings
- Redirects the browser to malicious websites
- Slow down the computer.
One launch is usually distributed through its official website. However, it might also be bundled with other software and installed with it. This misleading practice is a common tactic used by free app developers to increase their user base. If you surprisingly notice one launch on your system, the app was likely bundled with a program you recently installed. If you’re not using the program, uninstall it is best. Find out how below!
Automatic Way to Remove One launch Malware
SpyHunter can quickly and automatically remove the one-launch malware from your computer. Here’s how to remove this adware with SpyHunter.
Step 1: Go to the SpyHunter download page and download the software. Then, open the downloaded file once the download is finished.
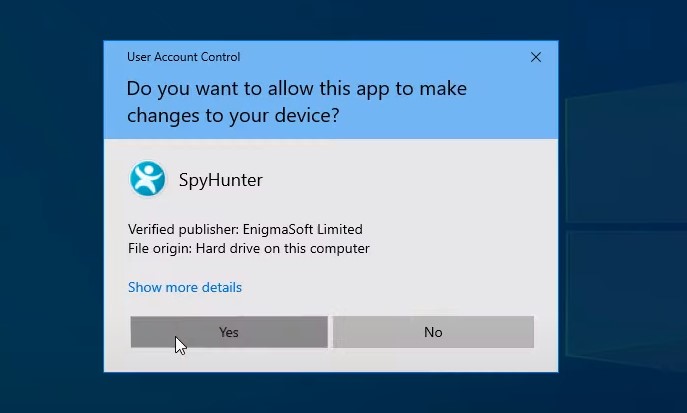
Step 2: Select “Yes” on the “User Account Control” dialog box and select your preferred language on the next page.
Step 3: Read and accept the “License Agreement.” Then, press the “Next” button “and then follow the setup wizard until you reach the “Finish” button to complete the installation.
Step 4: You should see the program on your homepage. If you don’t see it, search for “Spy Hunter” in the Windows search box.
Step 5: Click “Start Computer Scan Now” to start scanning your computer. Then, click “Remove” to delete the malware.
The Most Advanced Guide to Remove OnelaunchManually (Proceed with Caution!)
If you decide to remove malware manually, follow our step-by-step guide below. Note that this process takes 20-30 minutes and requires some technical skills. If you do not follow our steps carefully, this may damage or corrupt your Windows system, and you will end up paying more to reinstall the system and recover your data than getting malware removal software in the first place.
Before Proceeding to Solutions, You Need to Enter a Safe Mode
Step 1. Search for ‘Recovery Options‘ > Recovery > Advanced start-up > Restart now

Step 2. Then in Choose an option menu go to Troubleshoot > Advanced options > Startup Settings > Restart
Step 3. Once restarted, select Safe Mode with Networking and press Enter
Now let’s proceed to malware removal steps… Please follow our exact order of solutions to have a higher chance of success.
Solution #1 – Delete Suspicious Tasks in Task Scheduler
Step 1. Go to Control Panel > Administrative Tools > Task Scheduler
Step 2. Open the Task Scheduler Library folder and delete suspicious tasks
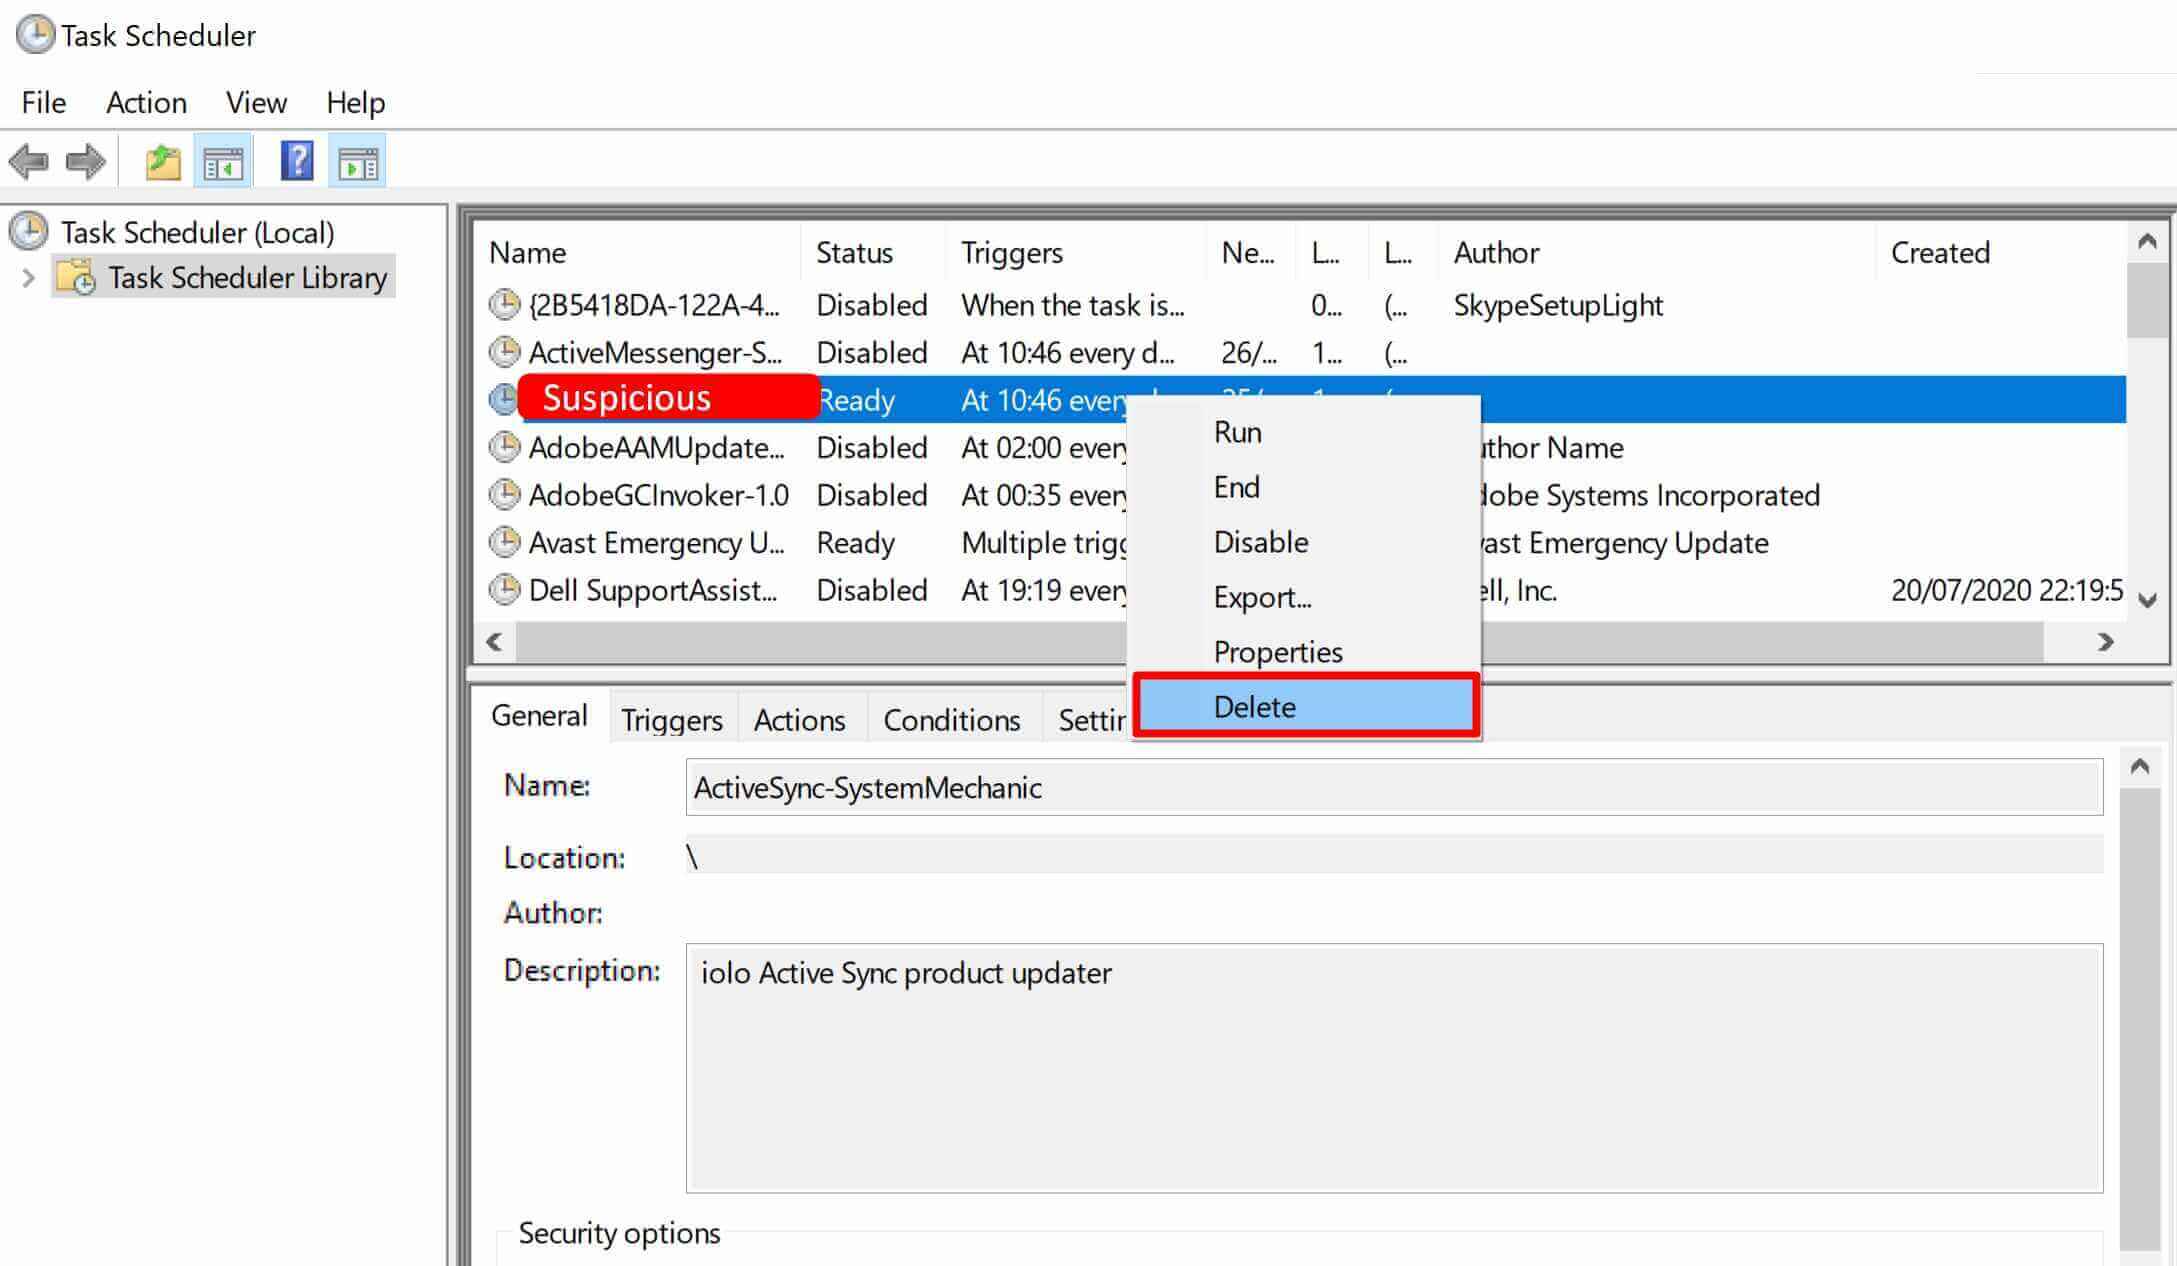
TIP: if you don’t recognize suspicious tasks, filter by ‘Created’ date and check the latest created tasks. Also, suspicious tasks might have a missing Author.
Solution #2 – Delete Suspicious Programs in Programs and Features
Step 1. Go to Control Panel > Programs and Features
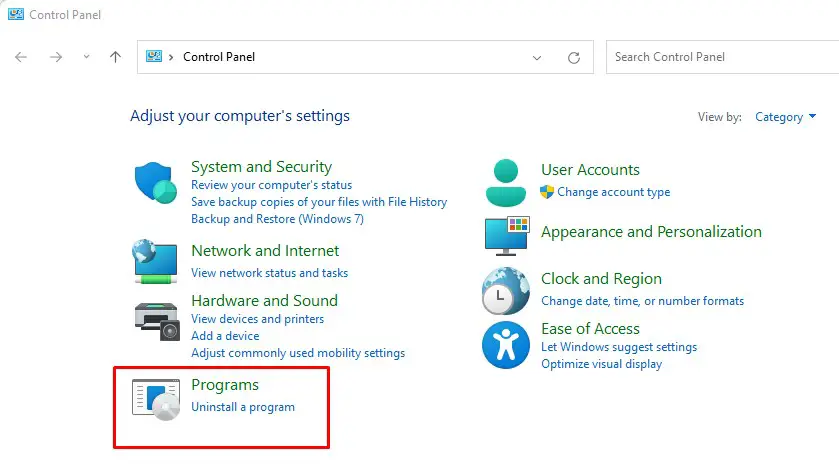
Step 2. Sort by ‘Installed On‘ date and delete suspicious programs
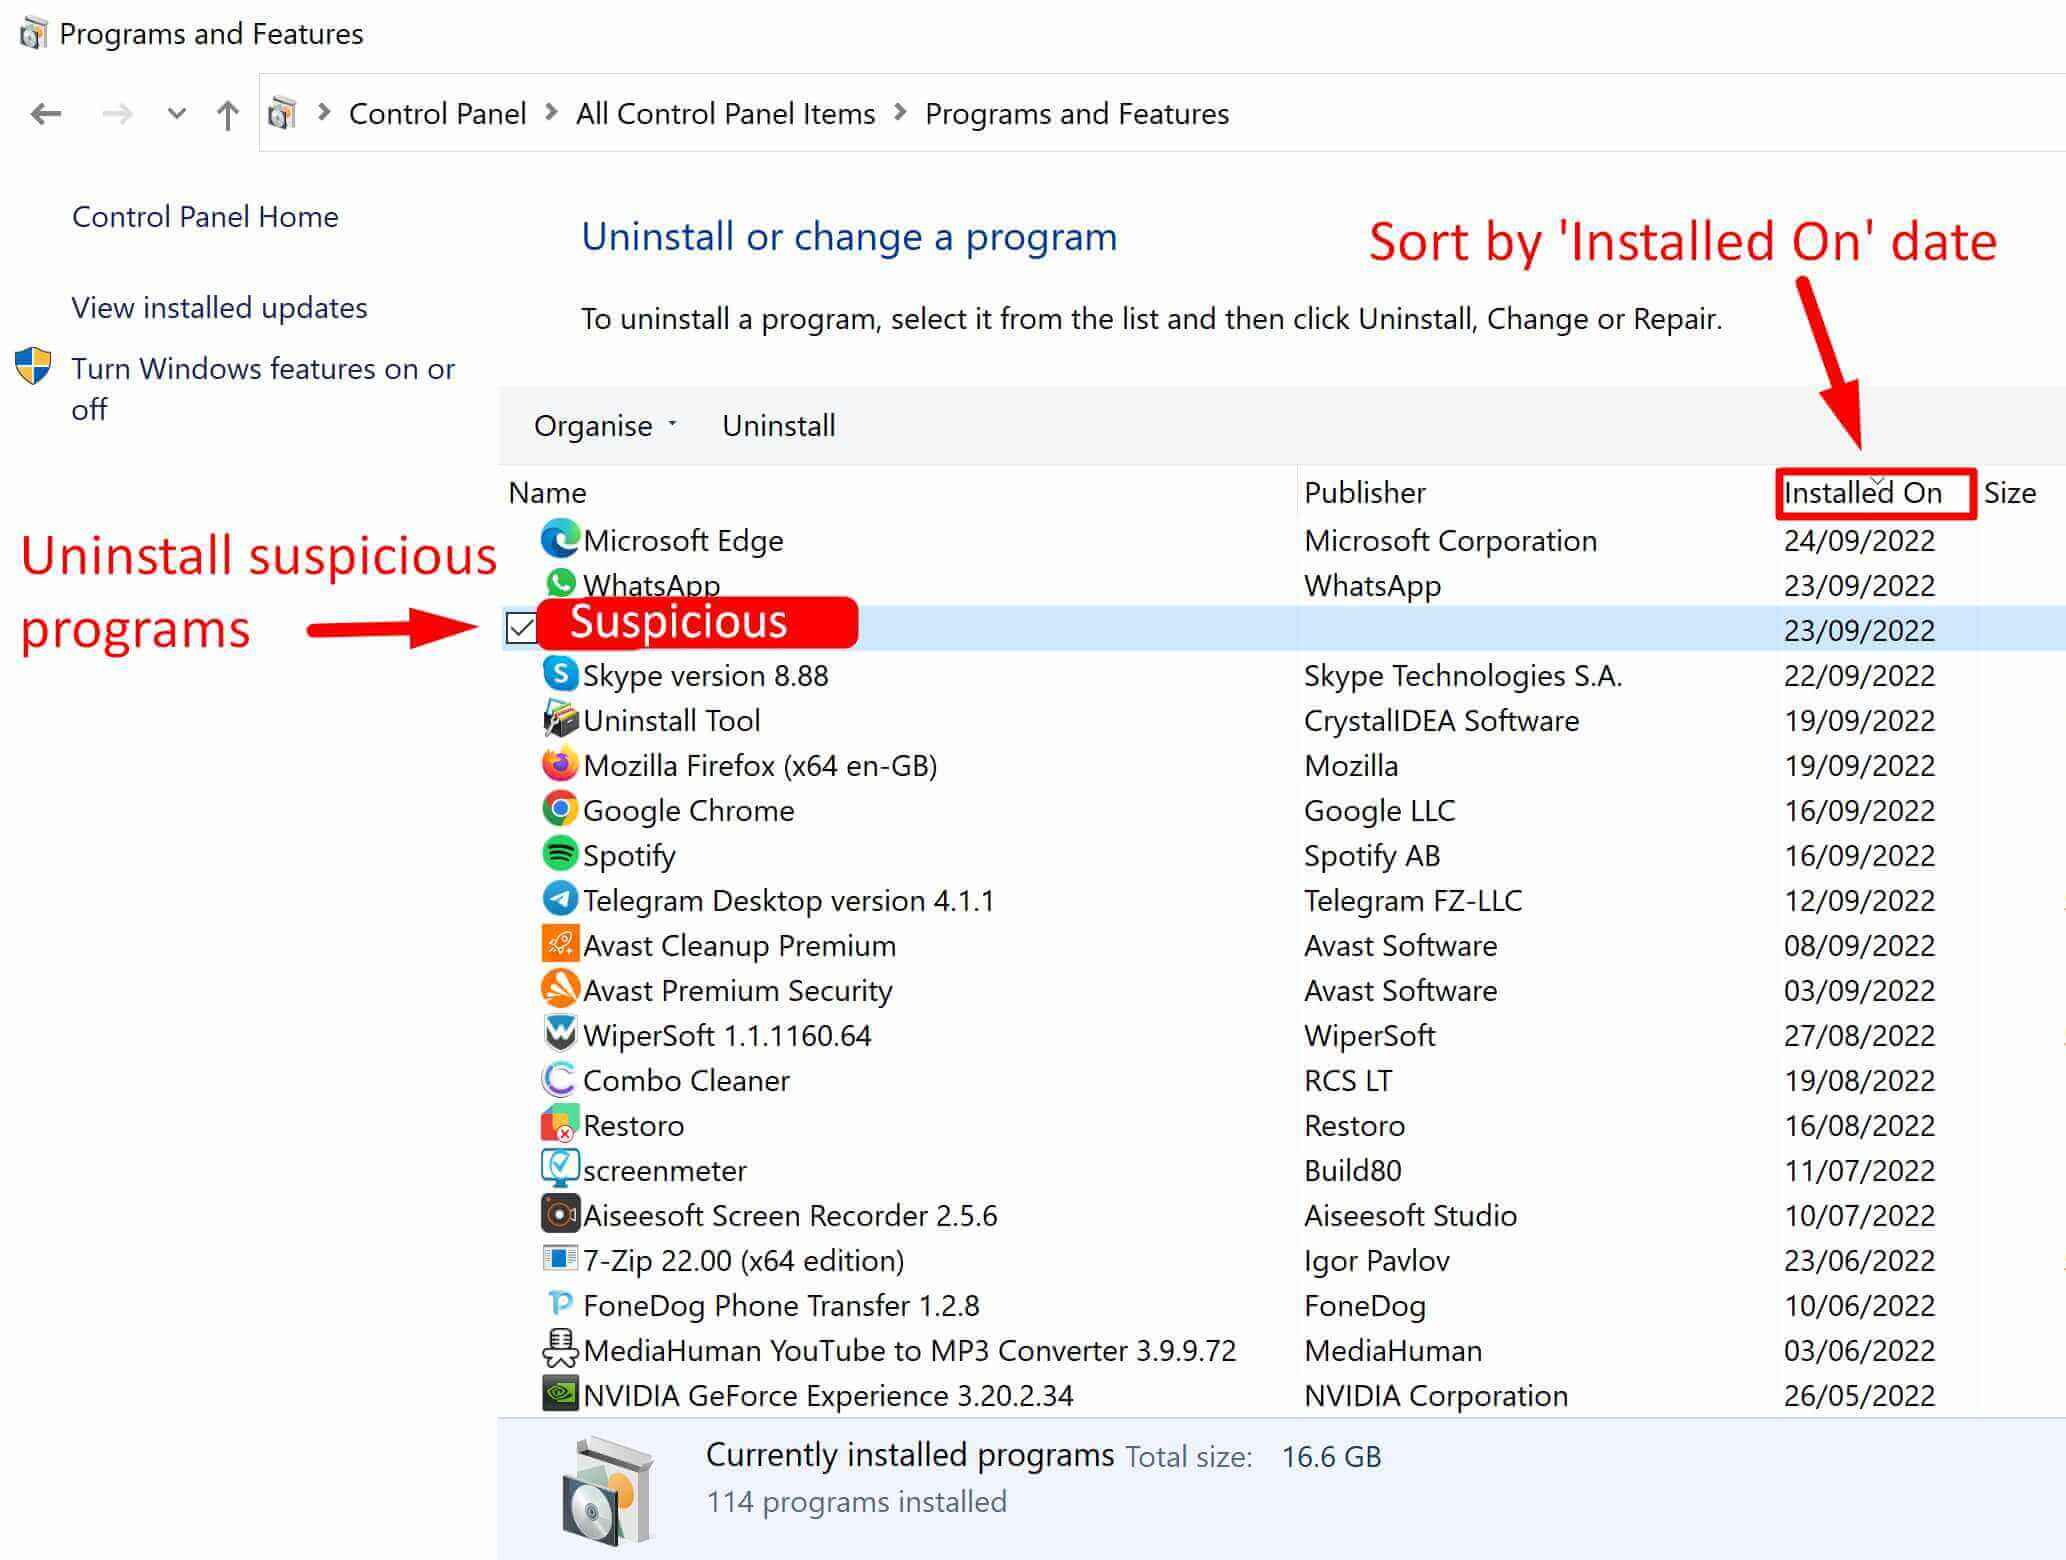
TIP: Think about what programs were installed just before your PC got infected.
Solution #3 – Delete Suspicious Files from Task Manager
Step 1. Open Task Manager and go to the Details tab
Step 2. Search for suspicious processes
Step 3. Right-click on suspicious process > Open file location, and delete the file or whole folder
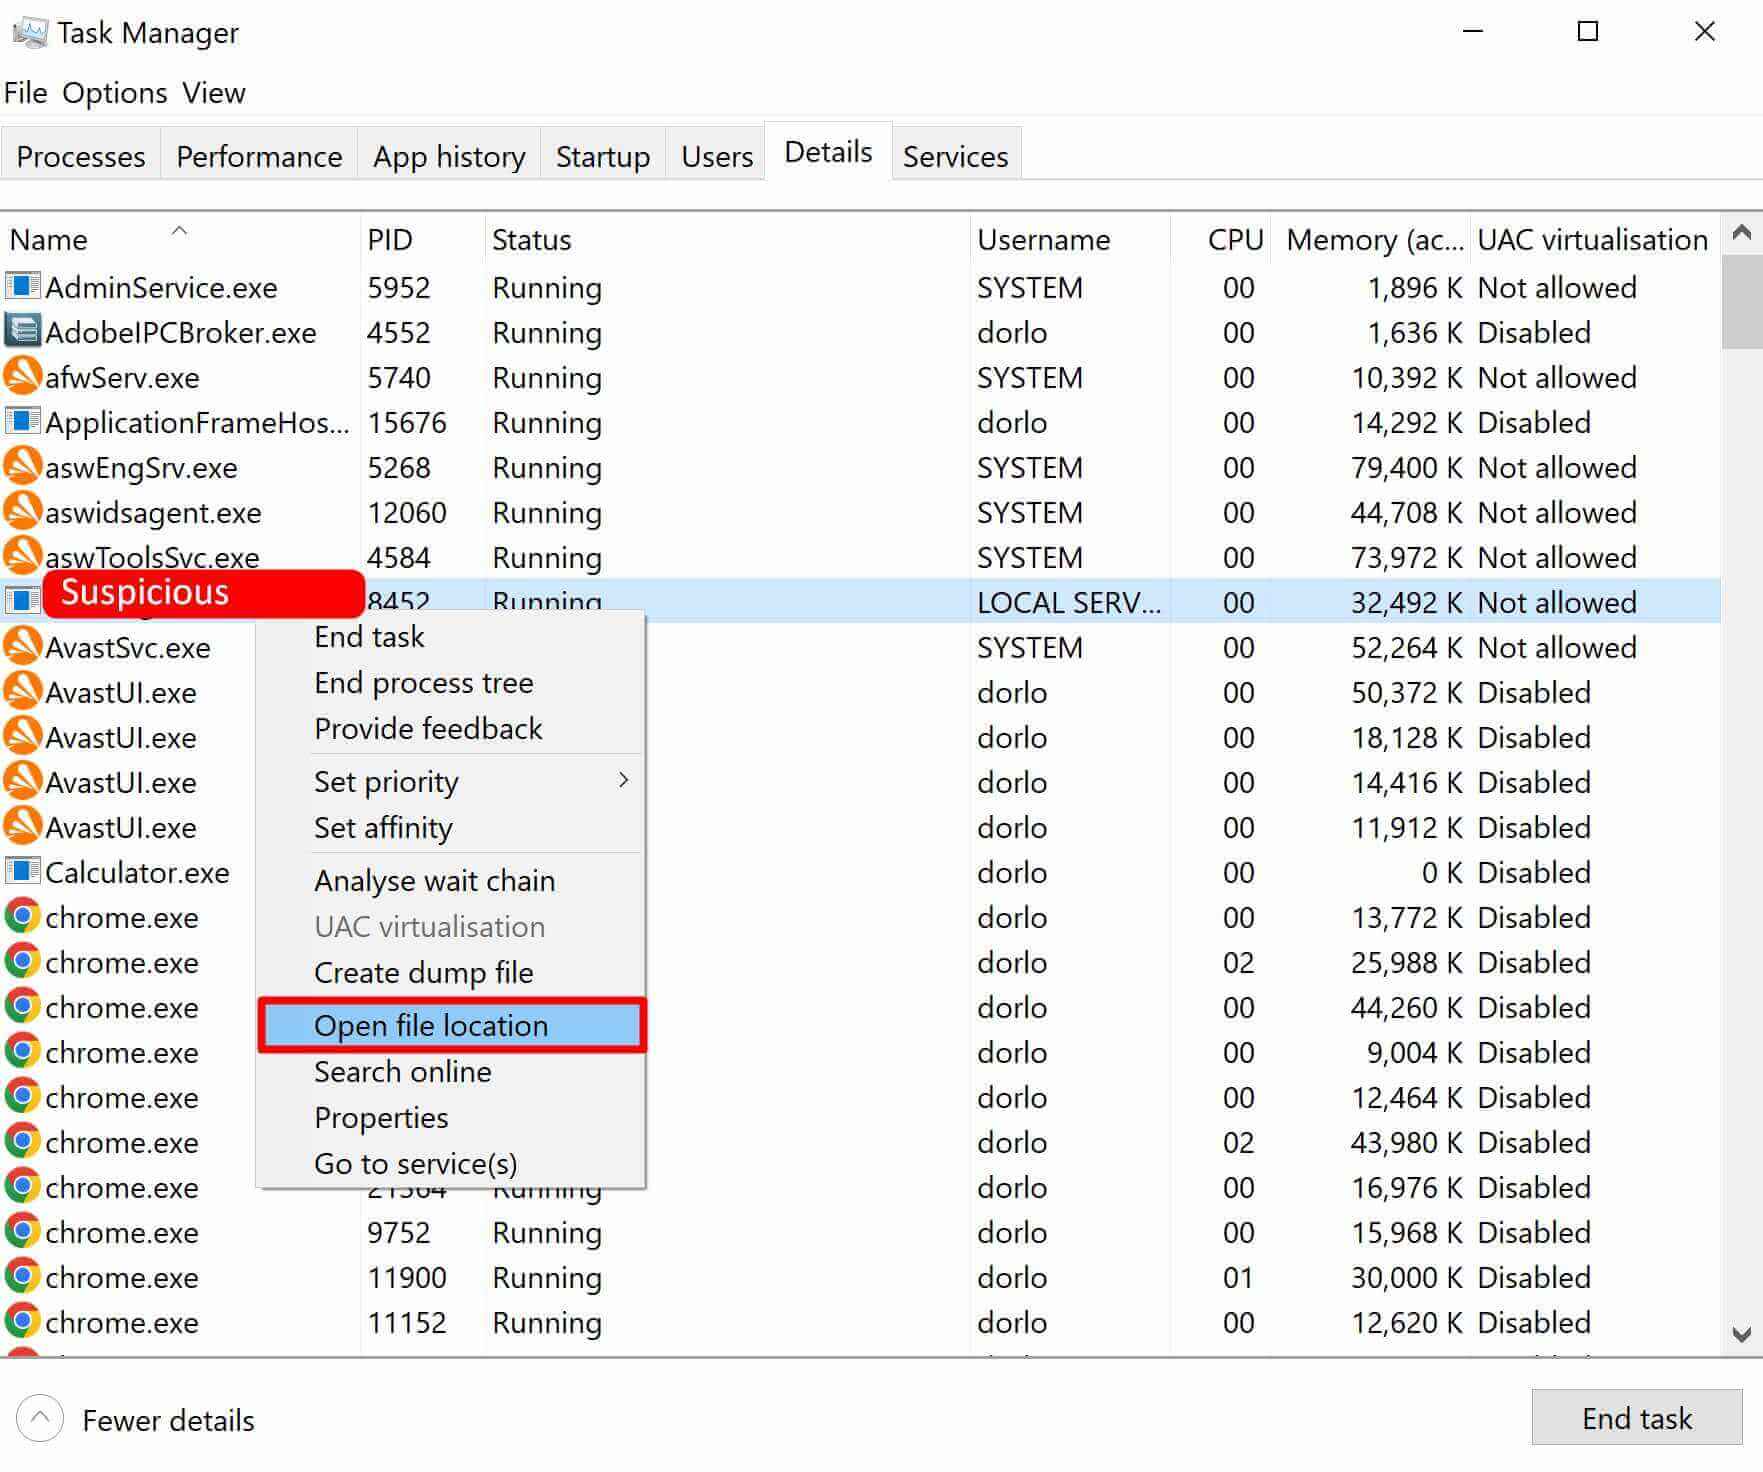
Step 4. Get back to Task Manager and end the suspicious process
Step 5. Then search the Startup tab for suspicious processes > Open the file location, and delete the file or whole folder
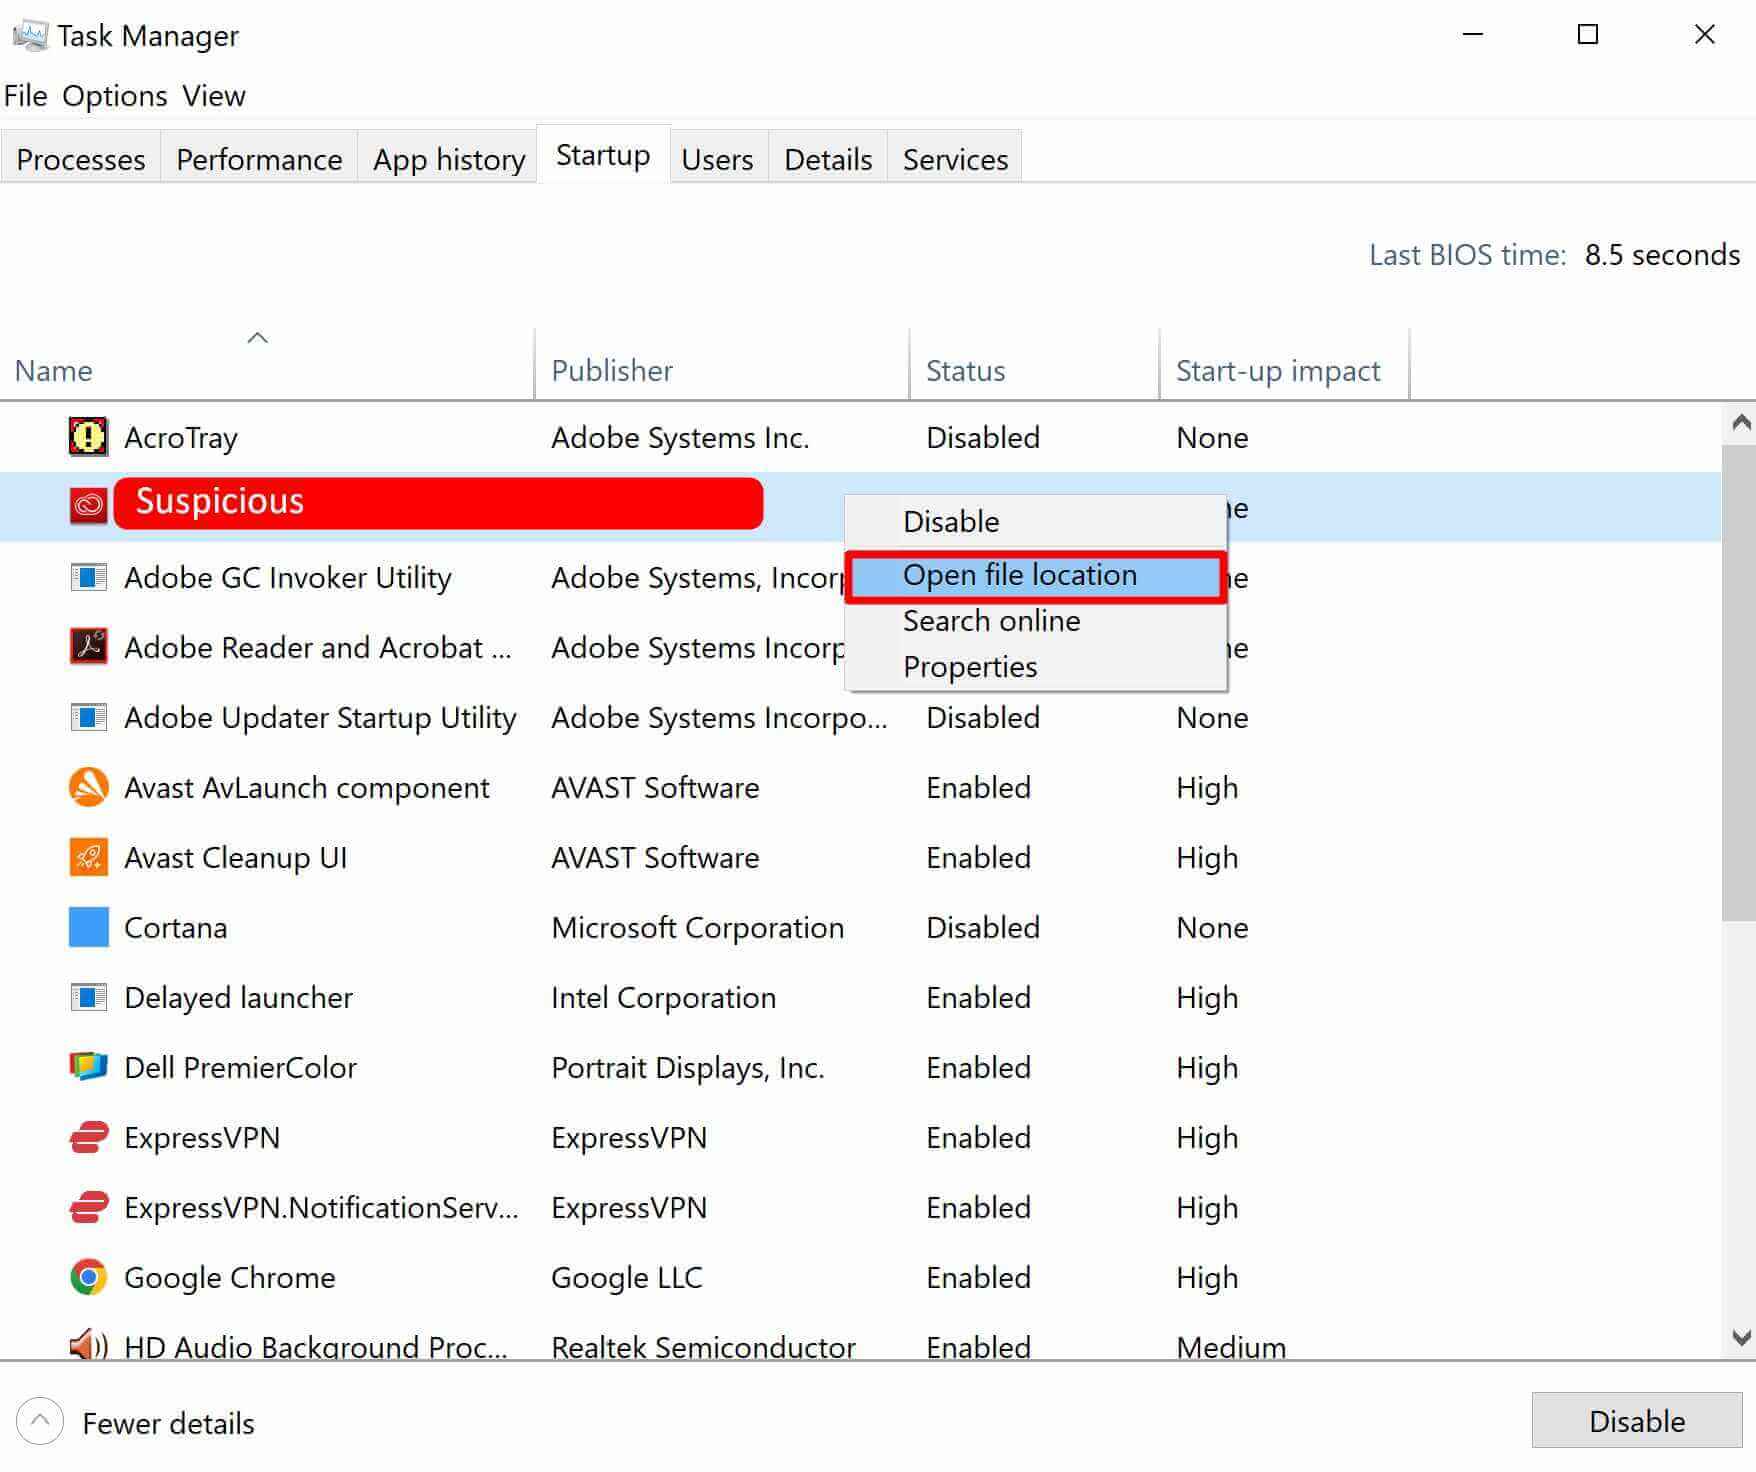
TIP: If ‘Access is denied’ and you’re unable to delete files, search for Resource Monitor (run as administrator), open and end the process in the Overview tab, then try to delete a file.
Solution #4 – Delete Suspicious Registries from Registry Editor
Step 1. Open Registry Editor (Run as administrator)
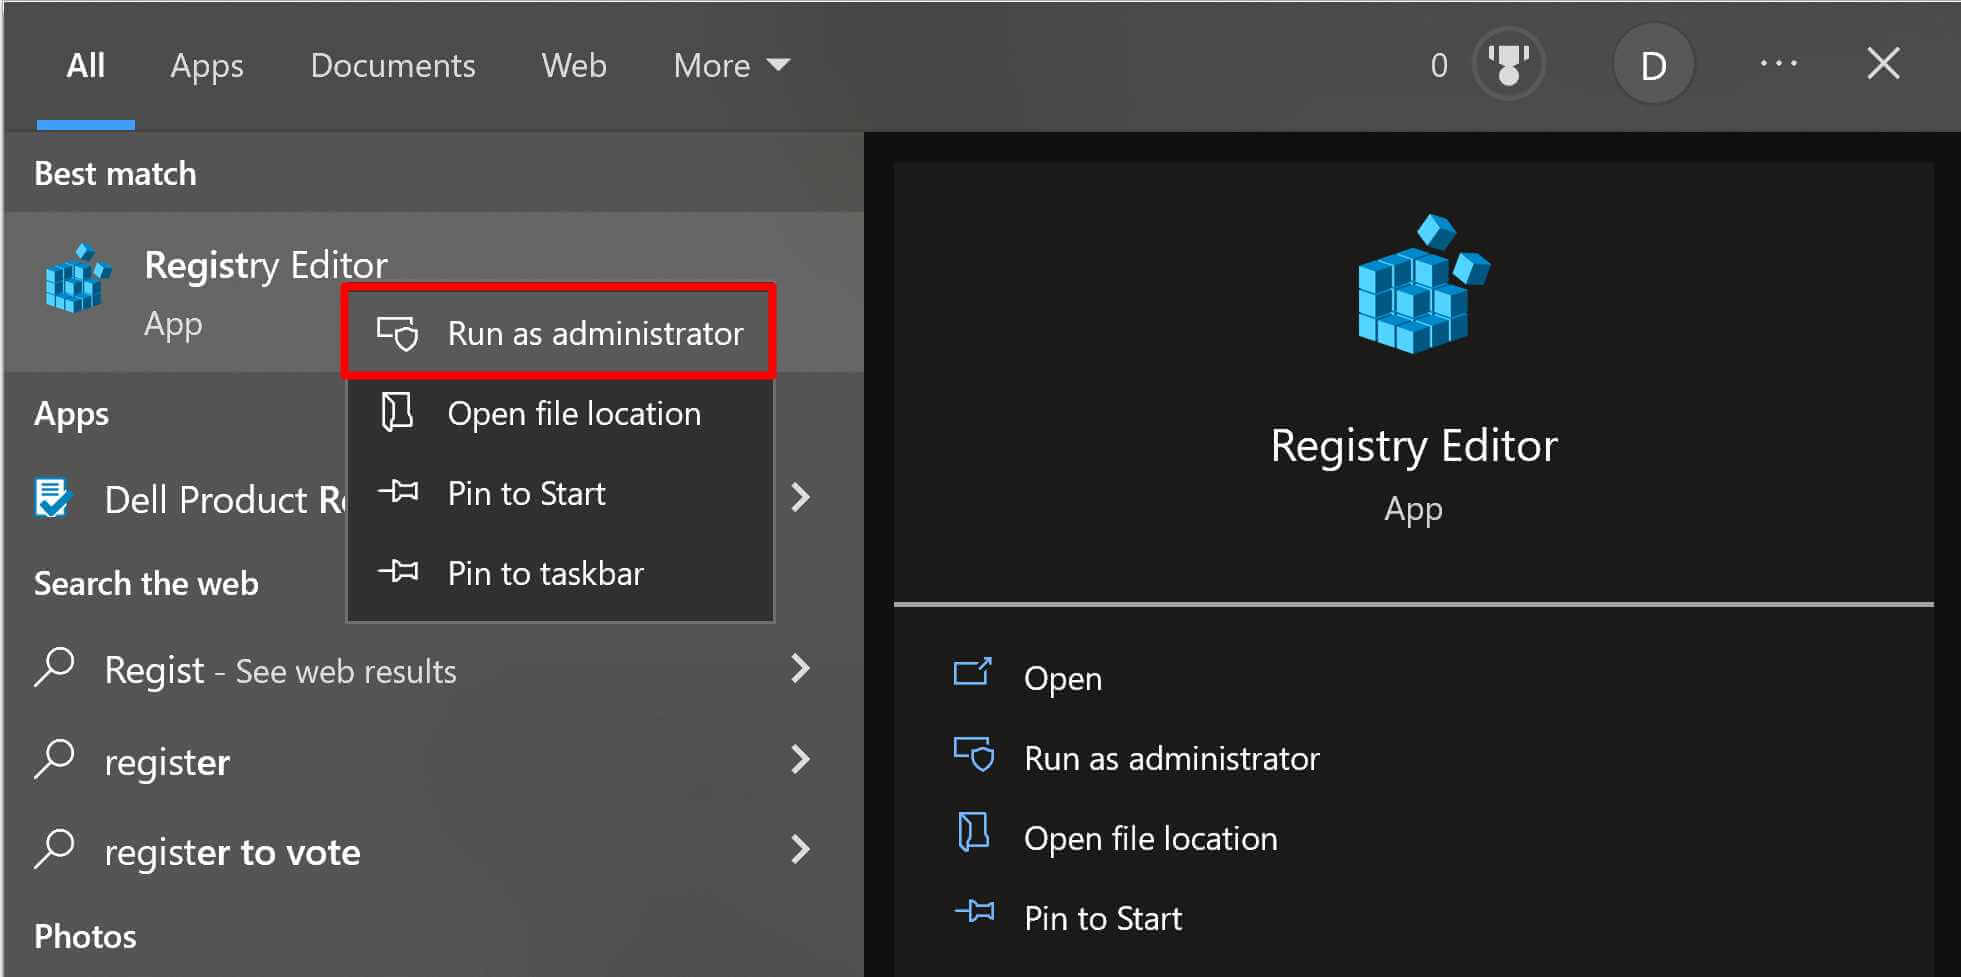
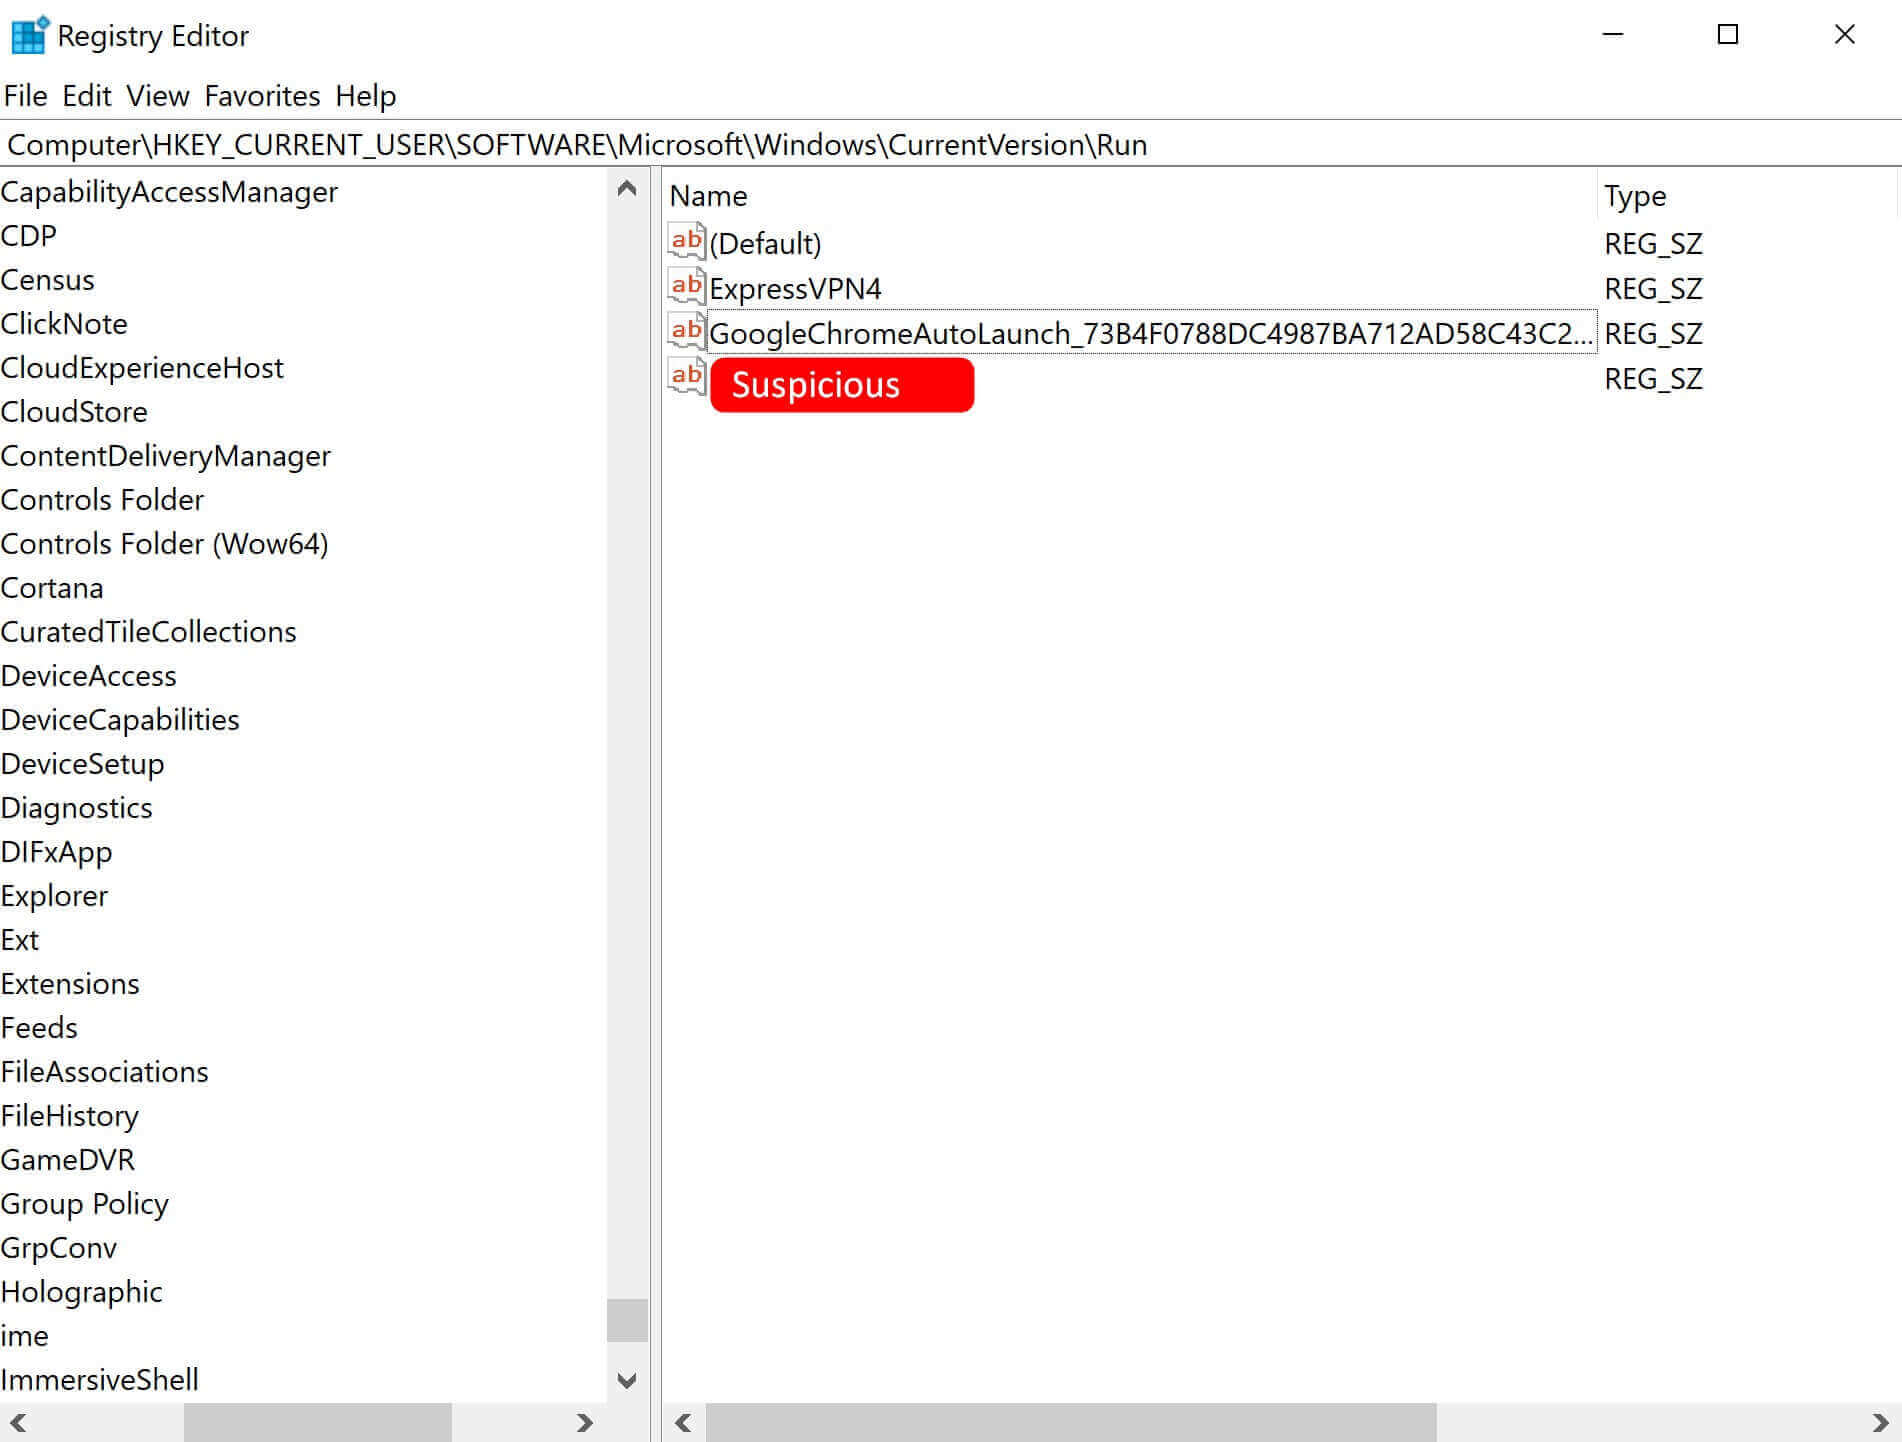
Step 2. Delete suspicious registries from:
ComputerHKEY_CURRENT_USERSOFTWAREMicrosoftWindowsCurrentVersionRun
ComputerHKEY_CURRENT_USERSOFTWAREMicrosoftWindowsCurrentVersionRunOnce locations
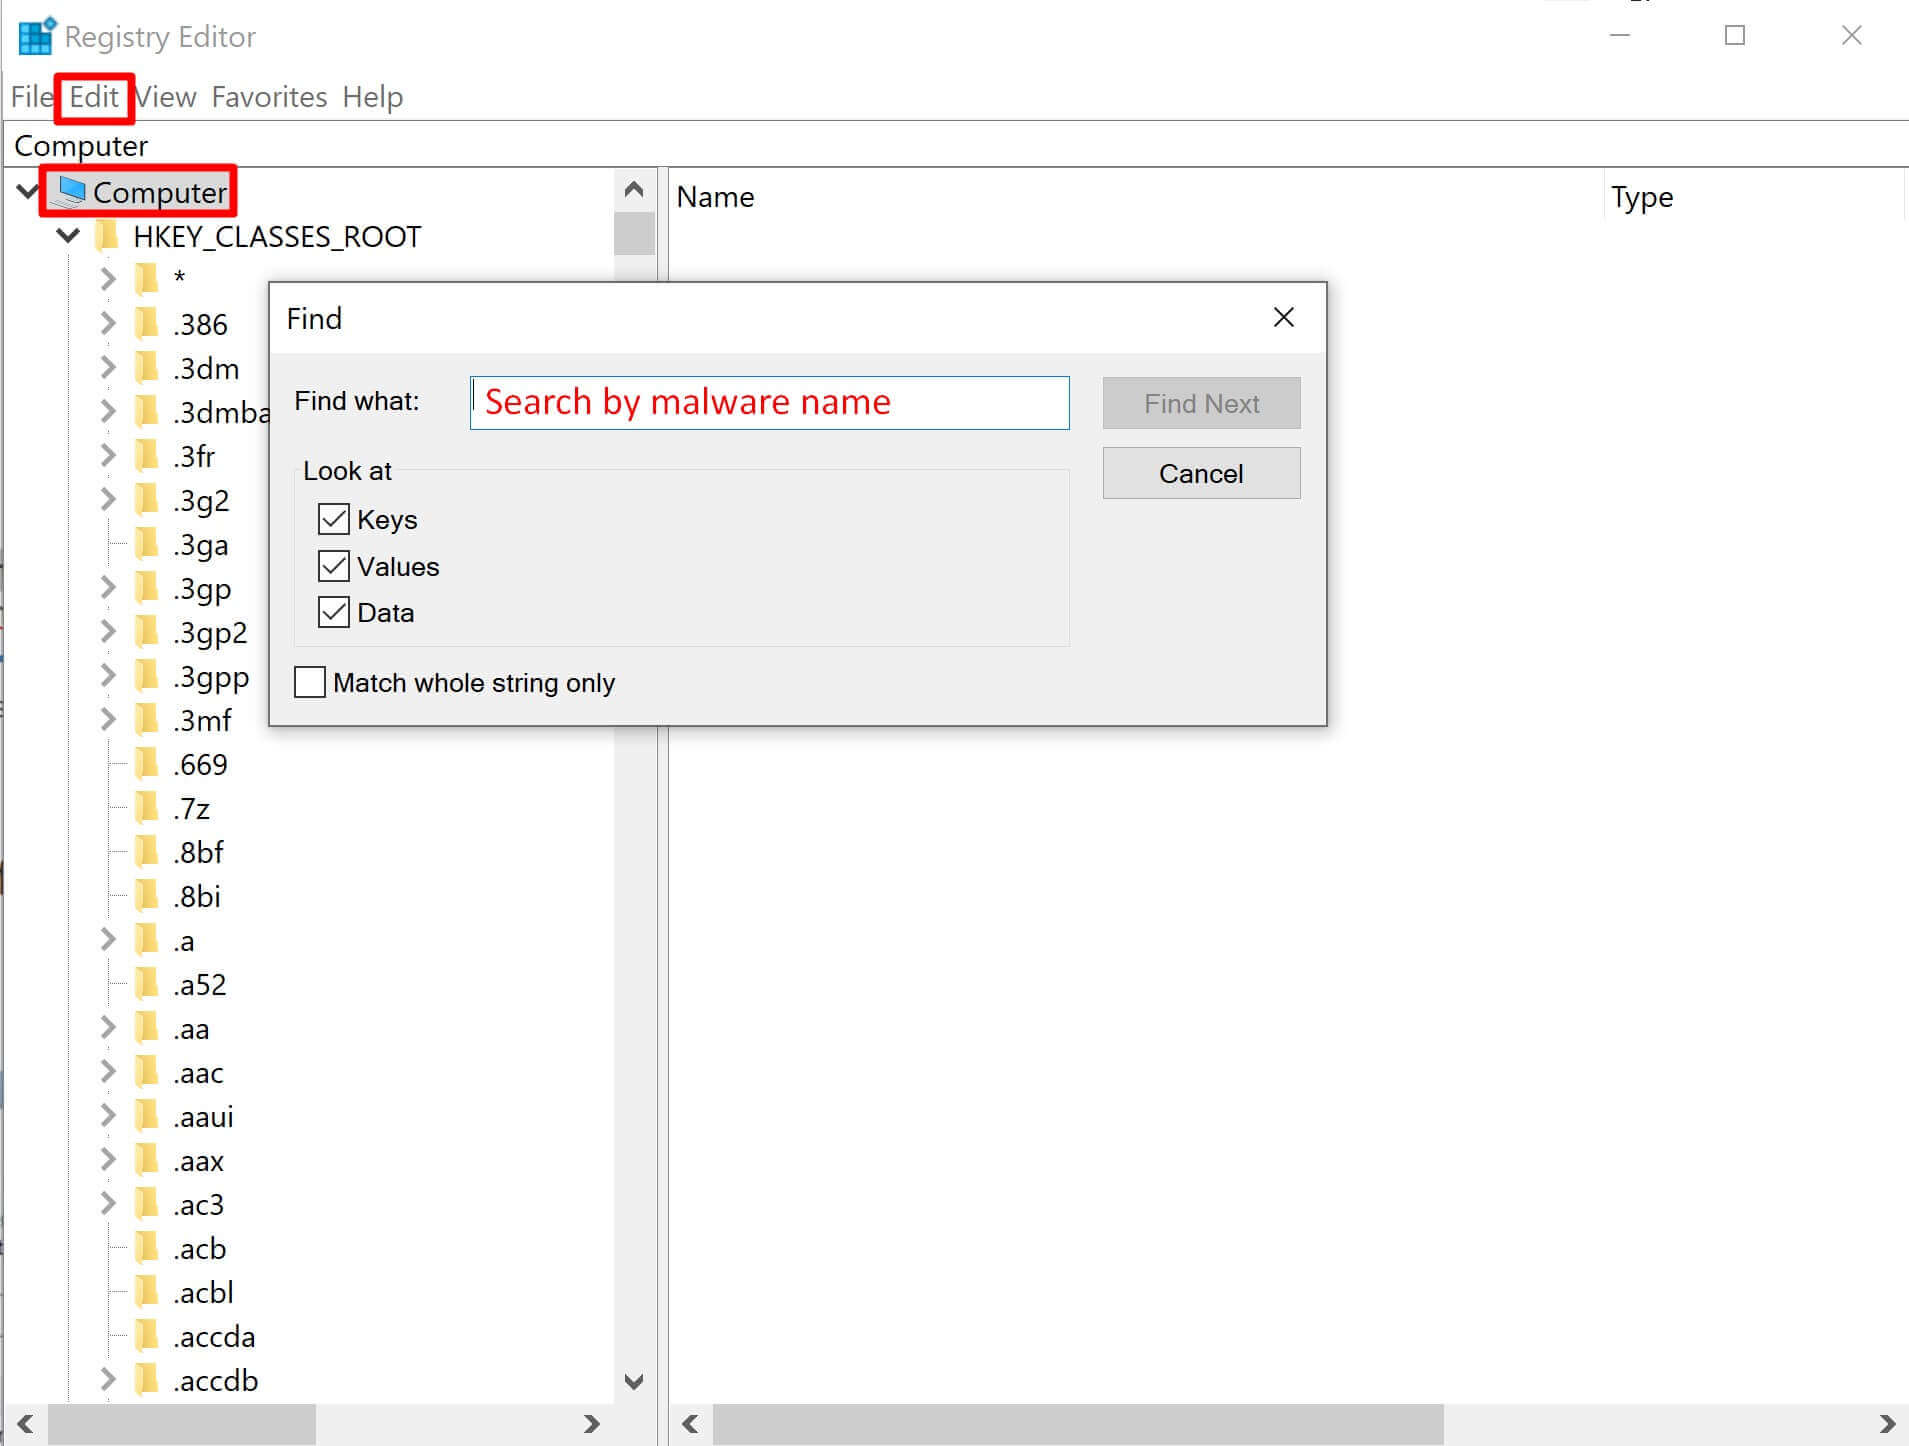
Step 3. Then select Computer and go to Edit > Find, and search Registry by names of suspicious files you remember from previous steps
TIP: You can easily delete suspicious registries from Run and RunOnce folders, however, be careful with deleting registries from other folders. This can break your system.
Solution #5 – Disable Suspicious Services in System Configuration
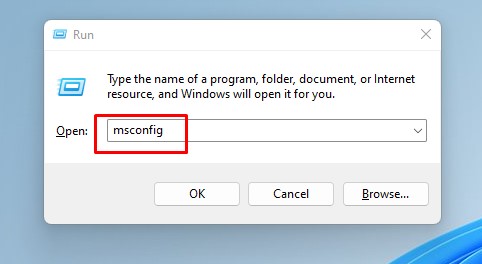
Step 1. Search for Run and type msconfig, then open the Services tab
Step 2. Tick ‘Hide all Microsoft services‘
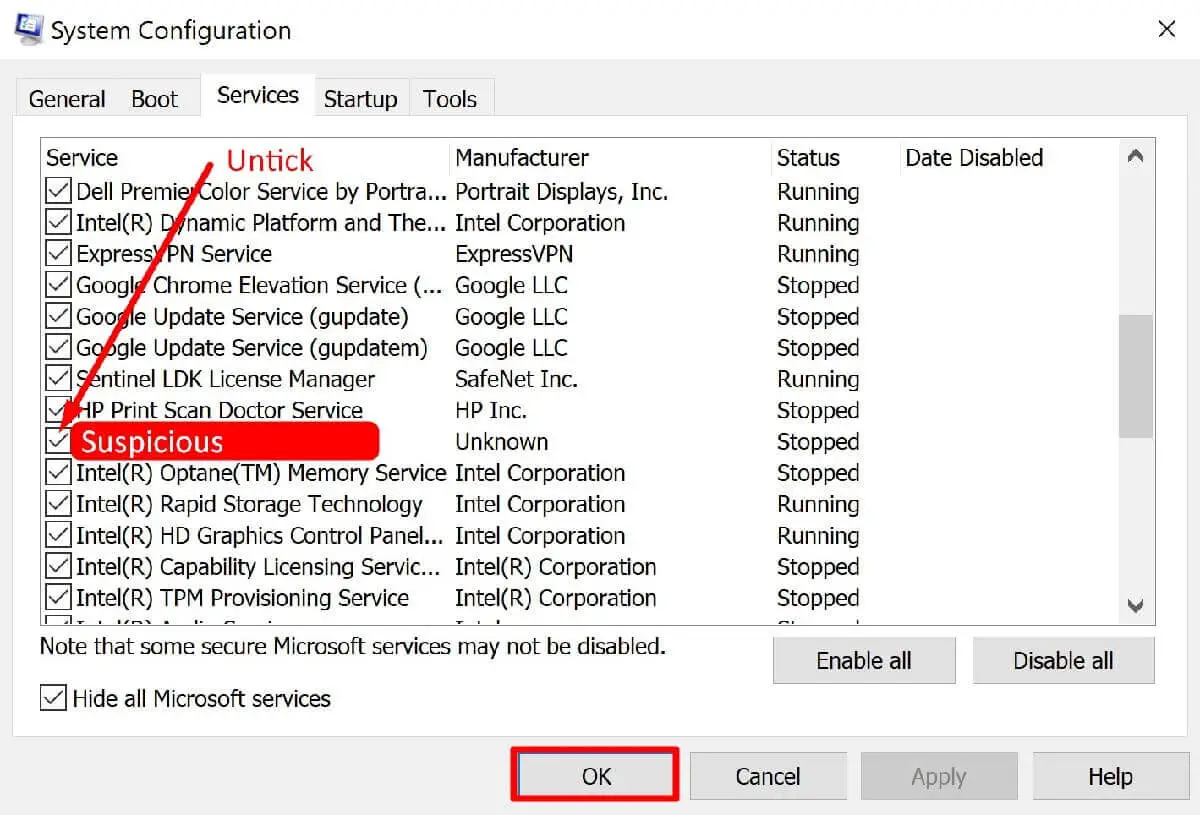
Step 3. Then search a list for suspicious services and untick them
TIP: Missing or unknown Manufacturer can be a good sign of suspicious service
Solution #6 – Delete Temporarily Files
Step 1. Search for Run and type %temp%
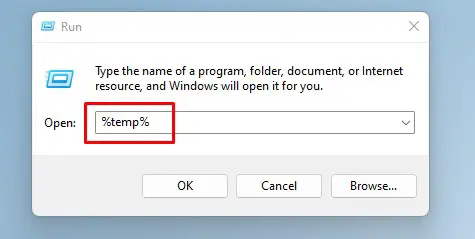
Step 2. Delete everything in the Temp folder
Step 3. Empty Recycle Bin
TIP: all temporary files can be deleted without hesitation. It will not damage your system.
Solution #7 – Check Hosts File
Step 1. Go to C:WindowsSystem32driversetc, and open the hosts file as Notepad
Step 2. Delete everything below ‘# ::1 localhost‘
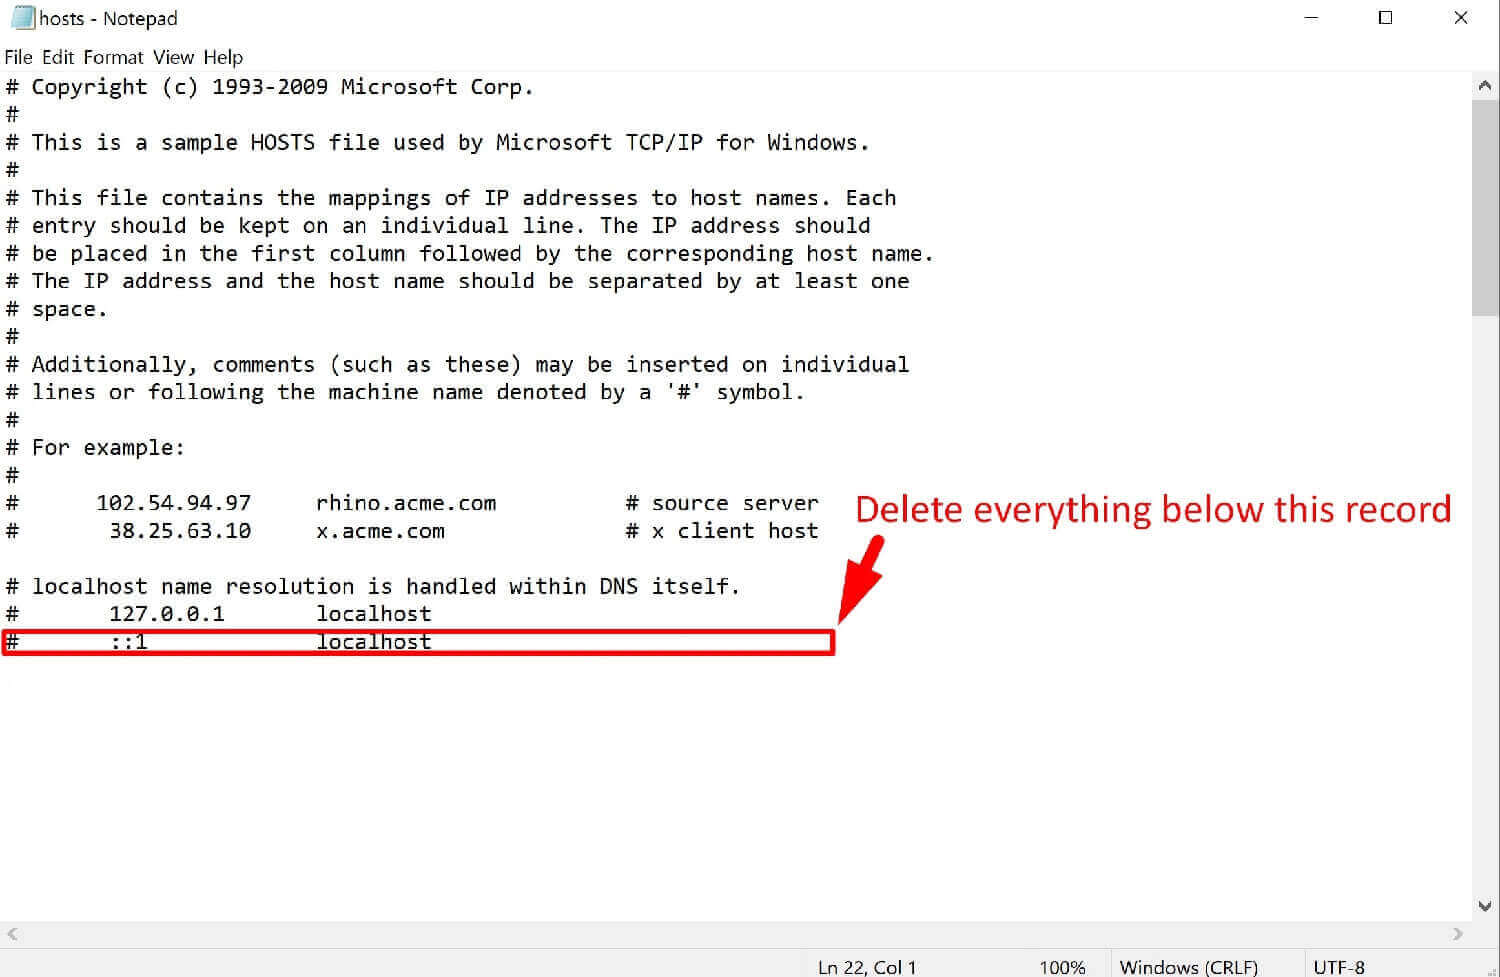
TIP: If a record doesn’t have ‘#’, this is definitely a suspicious record that should be deleted.
Solution #8 – Clean Browsers
Step 1. Search for your browser, right-click and open file location
Step 2. Then right-click on the browser icon and open Properties
Step 3. Delete everything after exe” in Target (for example, Google Chrome’s target should end with chrome.exe”)

Then you need to open your browser, delete suspicious extensions, notifications, and reset settings to defaults.
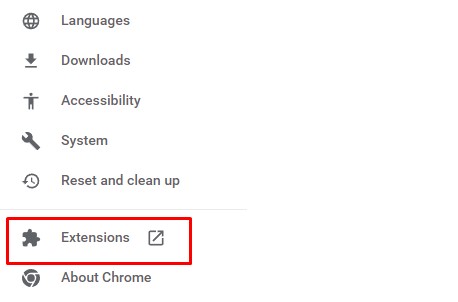
• Google Chrome:
Delete suspicious extensions: Settings > Extensions
Remove suspicious notifications: Settings > Privacy and security > Notifications, then remove suspicious notifications under ‘Allowed to send notifications‘
Reset settings to defaults: Settings > Reset and clean up > Restore settings to their original defaults > Reset settings
• Mozilla Firefox:
Delete suspicious add-ons: Menu > Add-ons and themes
Remove suspicious notifications: Menu > Privacy & Security > Notifications > Settings…, then remove websites you do not want to receive notifications from
Reset settings to defaults: Menu > Help > More troubleshooting information > Refresh Firefox > Refresh Firefox
• Opera:
Delete suspicious extensions: Click on Opera icon > Extensions > Extensions
Remove suspicious notifications: Click on Opera icon > Settings > Advanced > Privacy & security > Site Settings > Notifications, then under ‘Allowed to send notifications’ remove websites you do not want to receive notifications from
Reset settings to defaults: Click on Opera icon > Update and recovery > Recover
• Microsoft Edge:
Delete suspicious extensions: Menu > Extensions
Remove suspicious notifications: Menu > Settings > Cookies and site permissions > Notifications, then under ‘Allow‘ remove websites you do not want to receive notifications from
Reset settings to defaults: Menu > Settings > Reset settings > Restore settings to their default values > Reset
Solution #9 (Optional) – Follow This Solution if Your Browser Does Not Open Any Websites
If your browsers do not open any websites while other software can connect to the internet properly, you need to check internet properties:
Step 1. Go to Control Panel > Internet Options > Connections > LAN settings
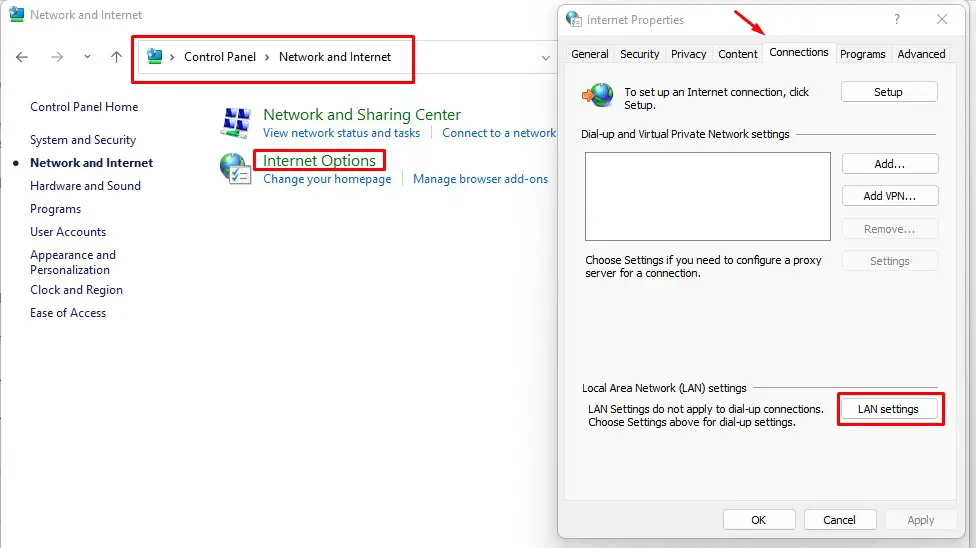
Step 2. Tick ‘Automatically detect settings’ and untick ‘Use a proxy server for your LAN’

Step 3. Then disable proxy servers in the browser if connection wasn’t restored yet
• Check AppInit_DLL in Registry
Step 1. Open Registry Editor (Run as administrator)
Step 2. Go to Edit > Find, search for AppInit_DLLs
Step 3. Open the AppInit_DLLs file and make sure Value Data is empty (don’t remove records starting with “SYS:”)
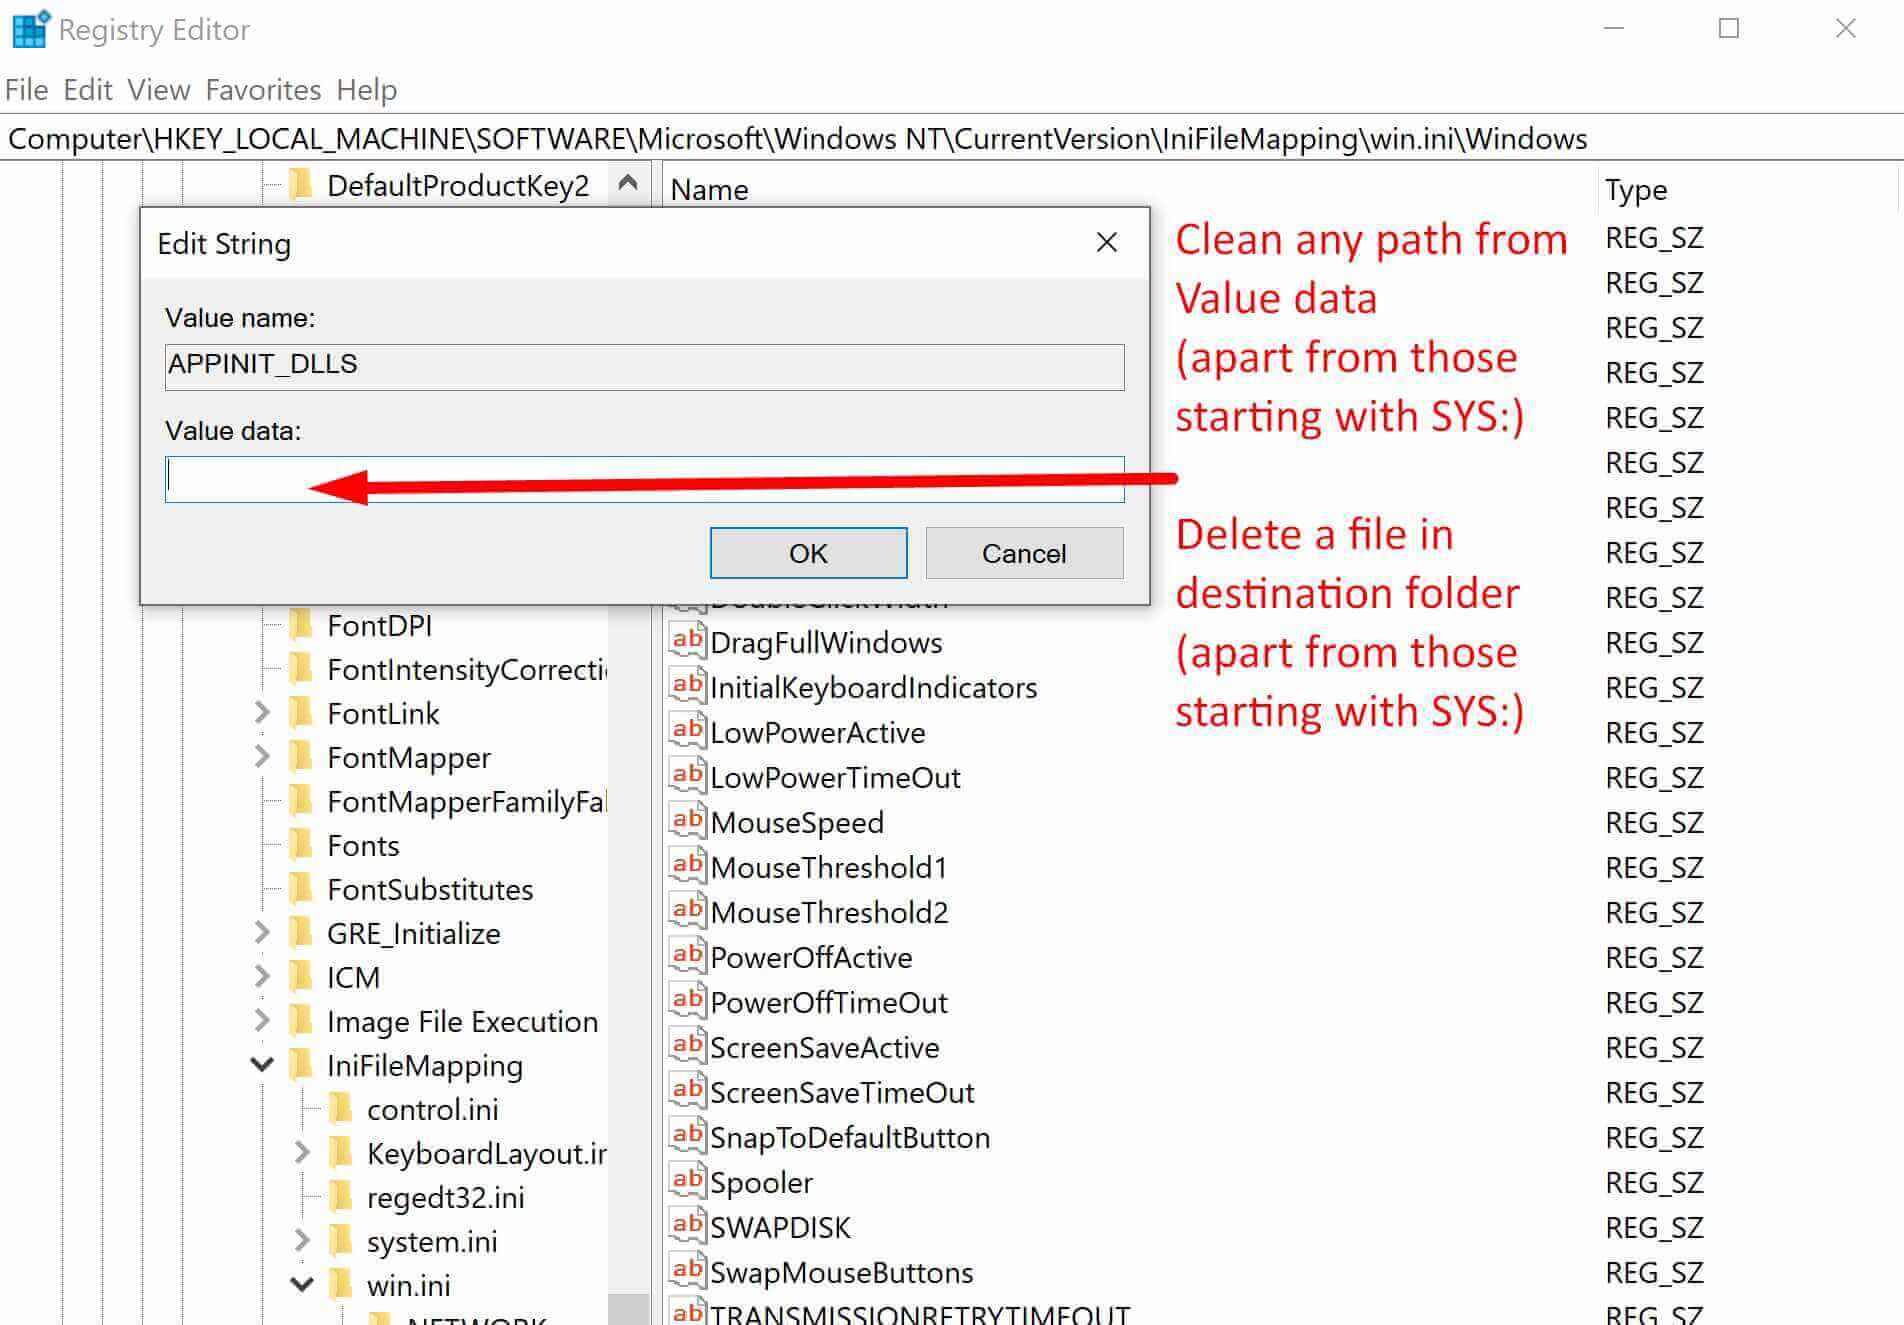
Step 4. If Value Data contains a path to any DLL file, follow that path, find and delete that DLL file, and clean Value Data in AppInit_DLLs file.
TIP: DLL file may be hidden in the destination folder. In that case, change the folder setting by going to View > Options > Change folder and search options > View, then select ‘Show hidden files, folders and drives’
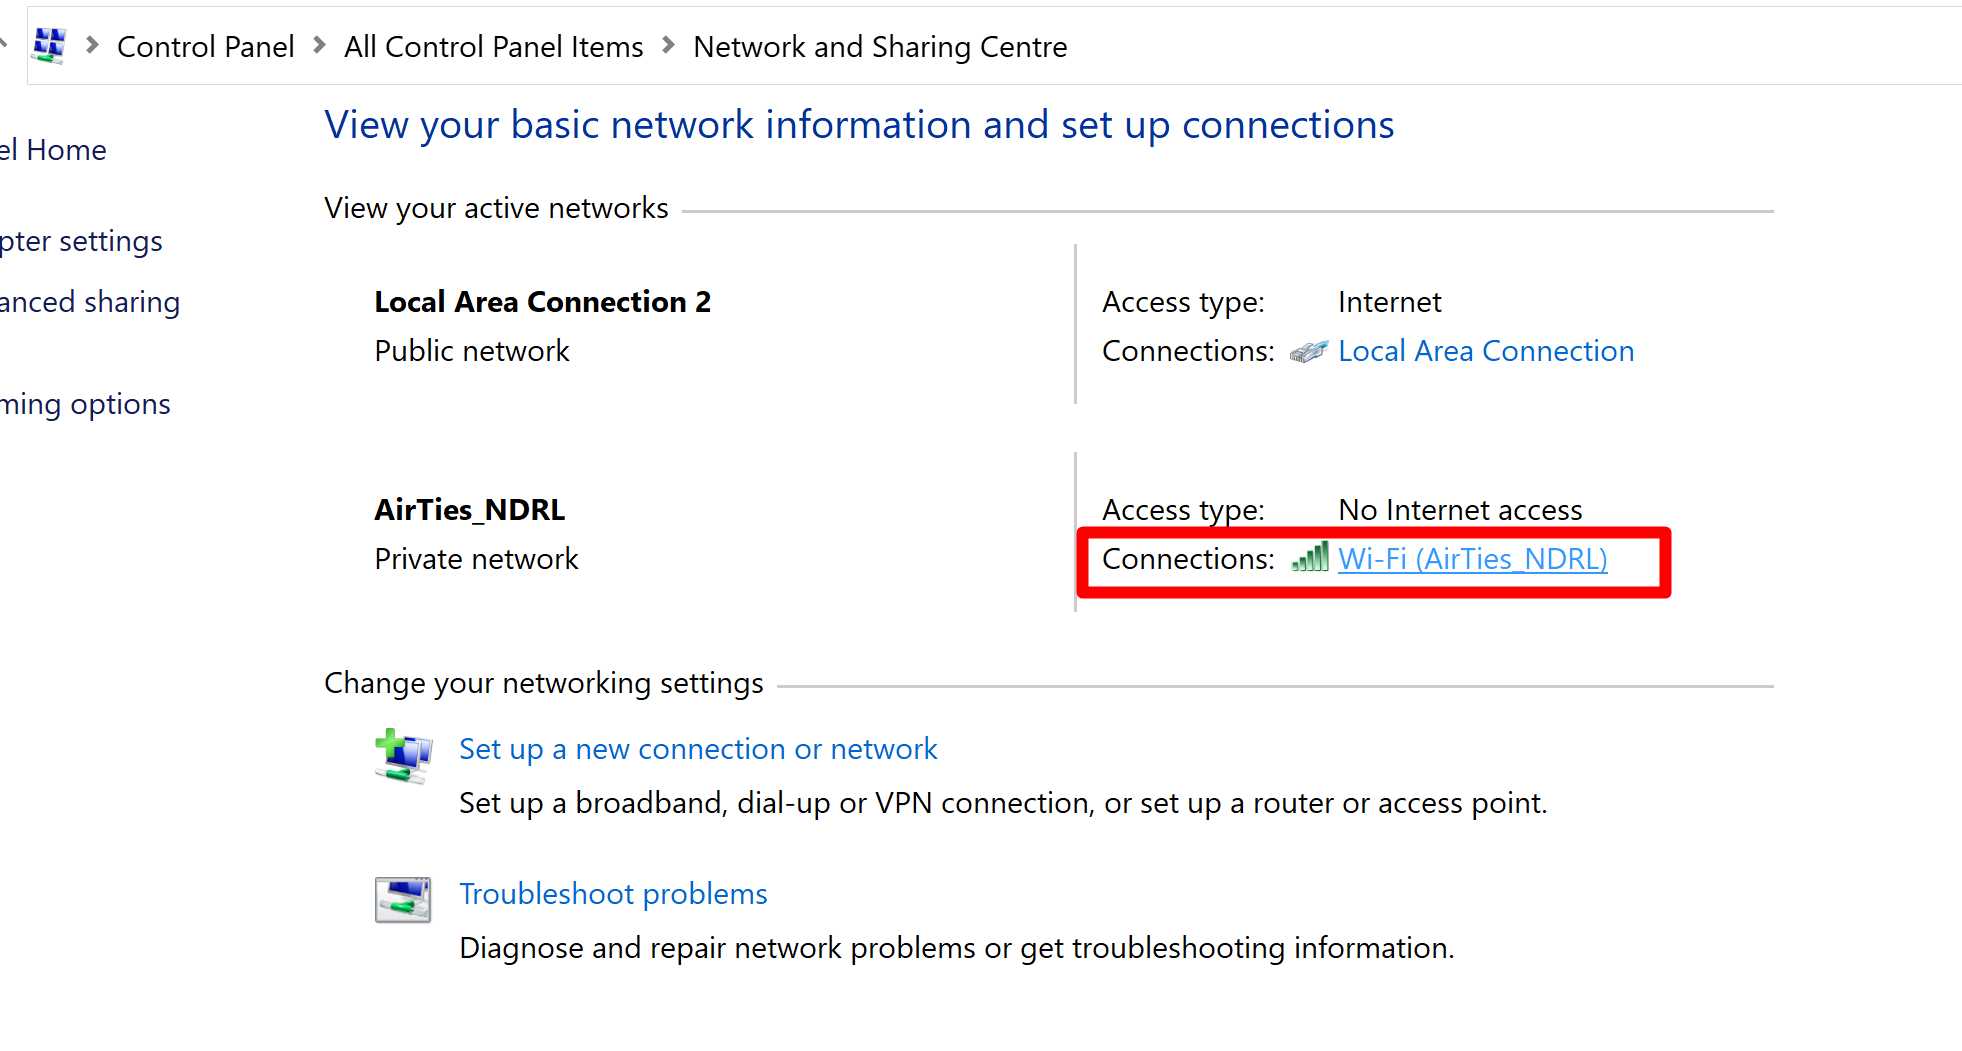
• Check DNS servers
Step 1. Go to Control Panel > All Control Panel Items > Network and Sharing Centre, then click on your Connection
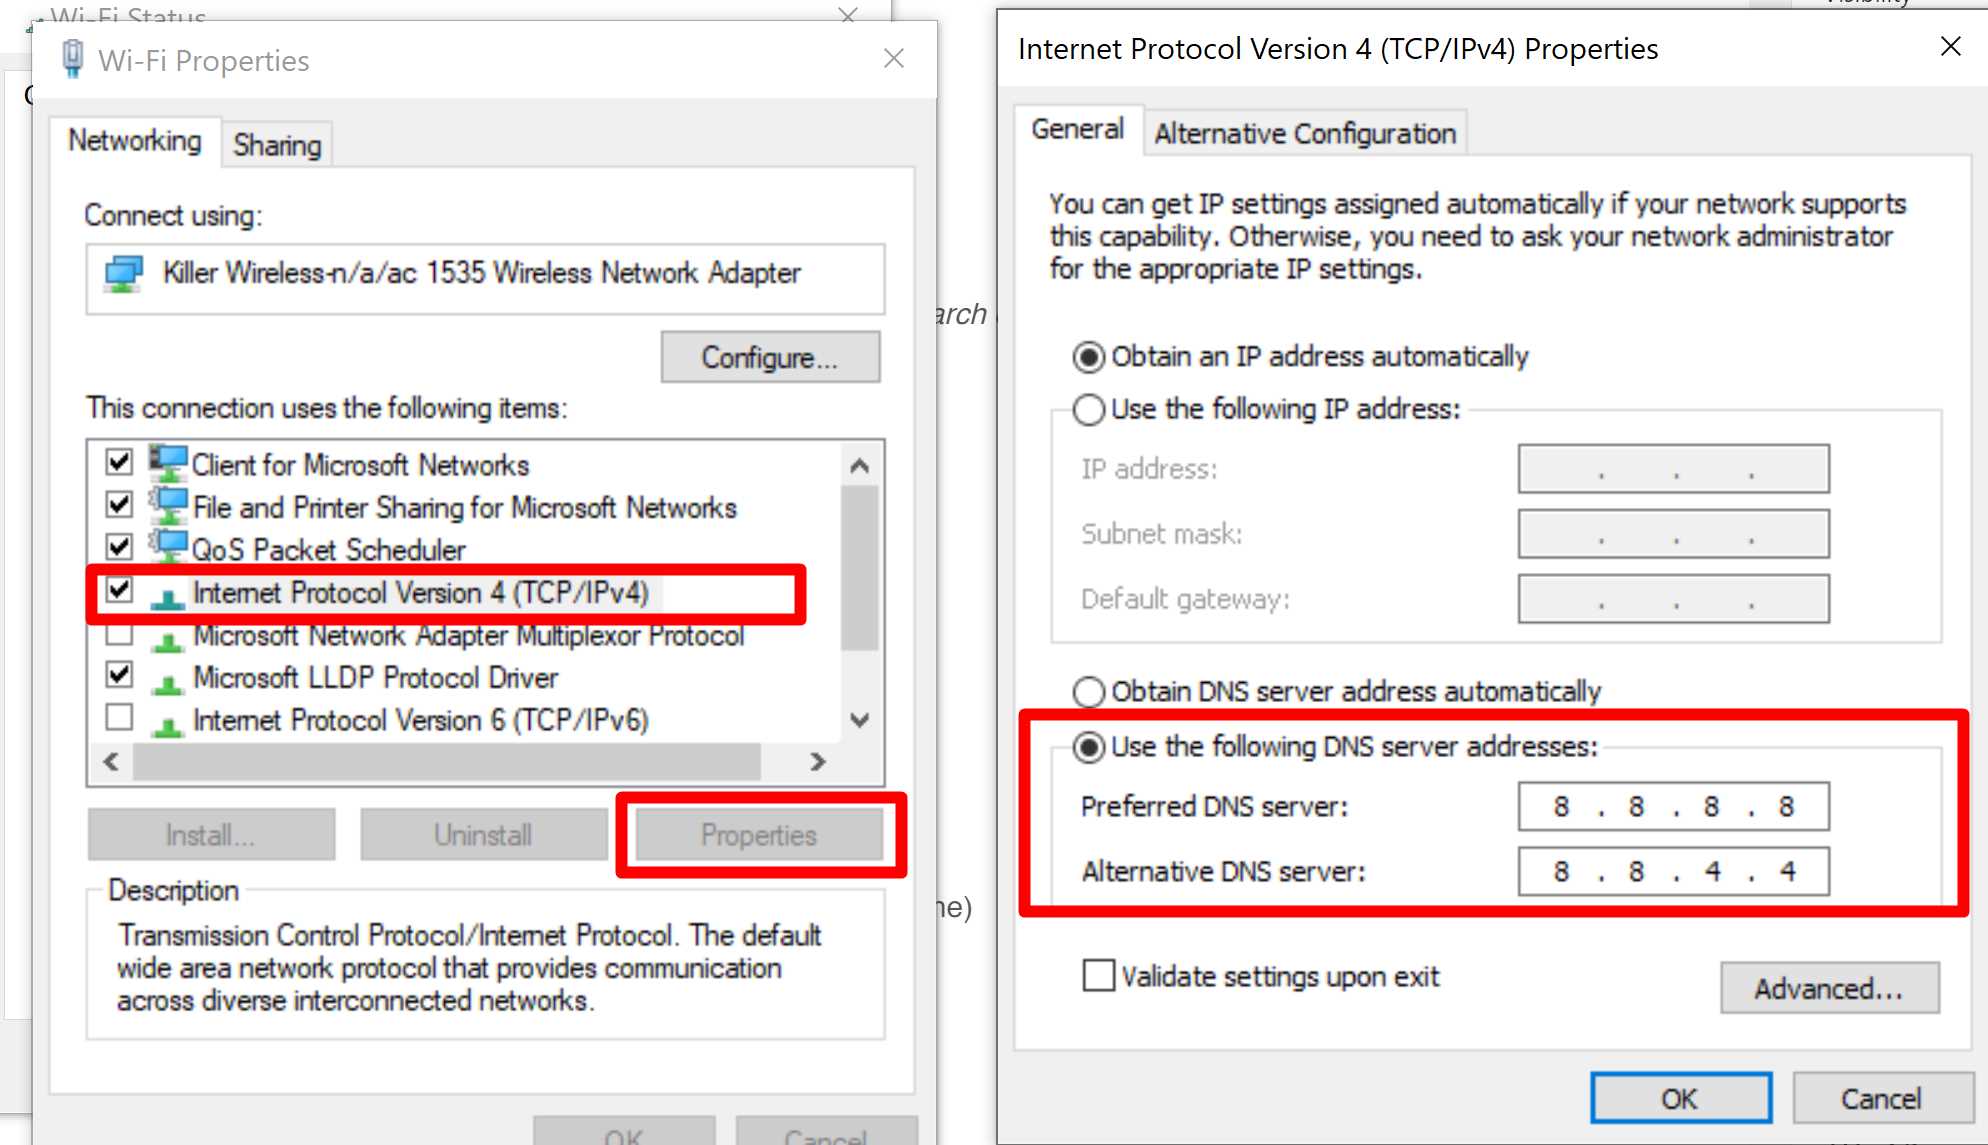
Step 2. Open Properties > Internet Protocol Version 4 (TCP/IPv4)
Step 3. Select ‘Use the following DNS server addresses’ and enter 8.8.8.8 to Preferred DNS server and 8.8.4.4 to Alternative DNS server
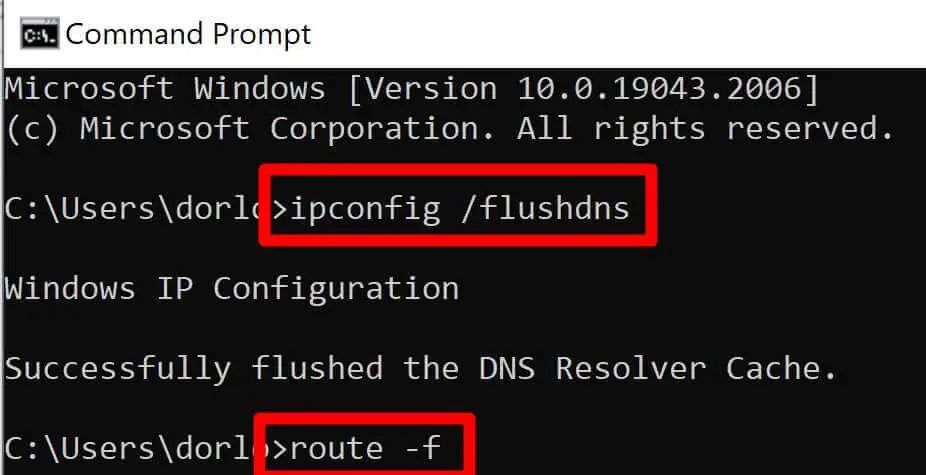
Step 4. Then open Command Prompt and enter the following commands: ipconfig /flushdns then route –f (these commands will clean DNS cache)
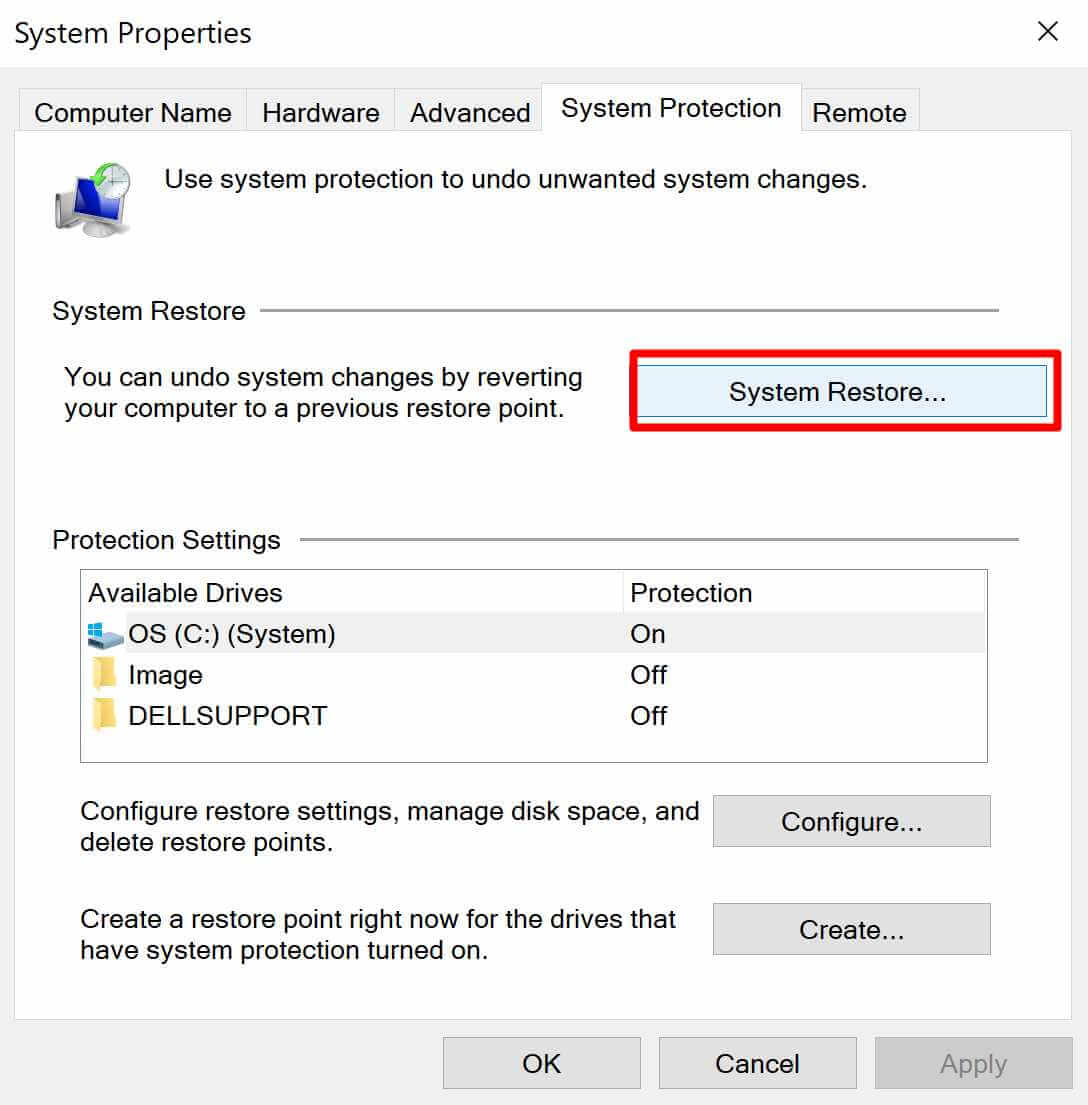
Solution #10 (Optional) – Restore the Windows
If the steps above do not remove malware, you can restore your Windows to the earlier point. This will not affect your pictures, documents or personal data, but some programs or drivers might be uninstalled.
Search for Create a restore point > System Restore… > Next > Select a date you want to restore your system to > Next > Finish
You may also need to decrypt or recover your personal files.
Conclusion
Hopefully, this article will help you remove the one-launch malware from your computer. Remember to use SpyHunter to remove this adware quickly and automatically.
FAQs
Fortunately, this malware can be removed with no hassles. We recommend using Spy Hunter to remove it automatically. You can also follow our manual removal methods.
One launch malware usually enters your PC as part of a package with free programs and other potentially harmful software downloaded on your computer. Adware creators compensate software developers for including adware in their programs. To prevent this adware from installing on your PC, select only Manual, Custom, or Advanced setup and reject malicious-looking bundled apps.


![How to Remove jsagent-egf [adw] Virus (Tested Solutions)](https://tentechreview.com/wp-content/uploads/2022/10/How-to-Remove-jsagent-egf-adw-Virus-Tested-Solutions-350x250.jpg)


![How to Take a Screenshot on Xiaomi Redmi Note 3 [+ Video Guide]](https://tentechreview.com/wp-content/uploads/2022/02/Take_Screenshot_Xiaomi_Redmi_Note_3-13-120x86.jpg)
![How to Take a Screenshot on Samsung Galaxy S II X T989D [+ Video Guide]](https://tentechreview.com/wp-content/uploads/2022/01/Take_Screenshot_Samsung_Galaxy_S_II_X_T989D-2-120x86.jpg)
![How to Take a Screenshot on Huawei P20 Pro [+ Video Guide]](https://tentechreview.com/wp-content/uploads/2022/02/Take_Screenshot_Huawei_P20_Pro-12-120x86.jpg)
![How to Take a Screenshot on Samsung Galaxy Trend II Duos S7572 [+ Video Guide]](https://tentechreview.com/wp-content/uploads/2022/01/Take_Screenshot_Samsung_Galaxy_Trend_II_Duos_S7572-1-120x86.jpg)
![How to Take a Screenshot on Samsung I9100G Galaxy S II [+ Video Guide]](https://tentechreview.com/wp-content/uploads/2022/01/Take_Screenshot_Samsung_I9100G_Galaxy_S_II-1-120x86.jpg)
![How to Take a Screenshot on Huawei Enjoy 6 [+ Video Guide]](https://tentechreview.com/wp-content/uploads/2022/02/Take_Screenshot_Huawei_Enjoy_6-10-120x86.jpg)
